CLI client - Getting started guide
In this tutorial, you will learn to use the CLI client zbctl to interact with Camunda Cloud.
Prerequisites
Set up
Installation
An installation can be done quickly via the package manager npm. The corresponding package is here.
npm i -g zbctl
You can also download a binary for your Operating System from the Zeebe GitHub releases page.
Connection settings
To use zbctl it is recommended to define environment variables for the connection settings:
export ZEEBE_ADDRESS='[Zeebe API]'
export ZEEBE_CLIENT_ID='[Client ID]'
export ZEEBE_CLIENT_SECRET='[Client Secret]'
export ZEEBE_AUTHORIZATION_SERVER_URL='[OAuth API]'
When you create client credentials in Camunda Cloud you have the option to download a file with above lines filled out for you.
Alternatively, use the described flags (--address, --clientId and --clientSecret). with the zbctl commands.
Test command
Use this command to verify that everything is set up correctly:
zbctl status
As a result you will get a similar response:
Cluster size: 1
Partitions count: 2
Replication factor: 1
Gateway version: unavailable
Brokers:
  Broker 0 - zeebe-0.zeebe-broker-service.456637ef-8832-428b-a2a4-82b531b25635-zeebe.svc.cluster.local:26501
    Version: unavailable
    Partition 1 : Leader
    Partition 2 : Leader
Advanced process
Use this process model for the tutorial.
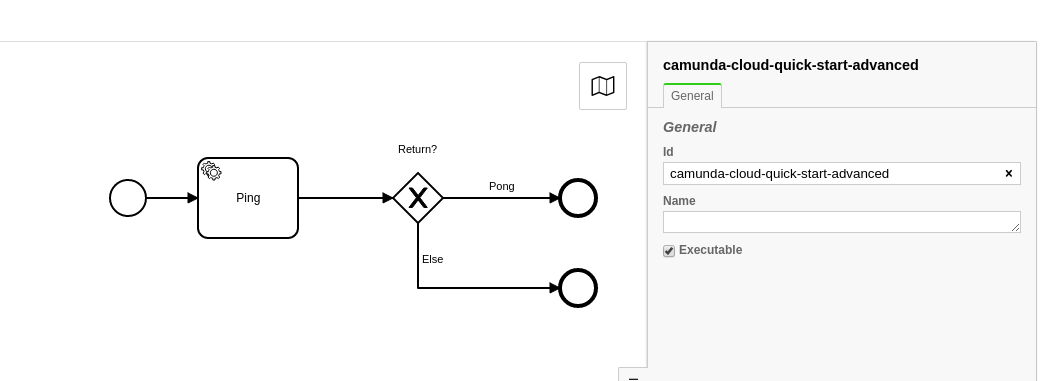
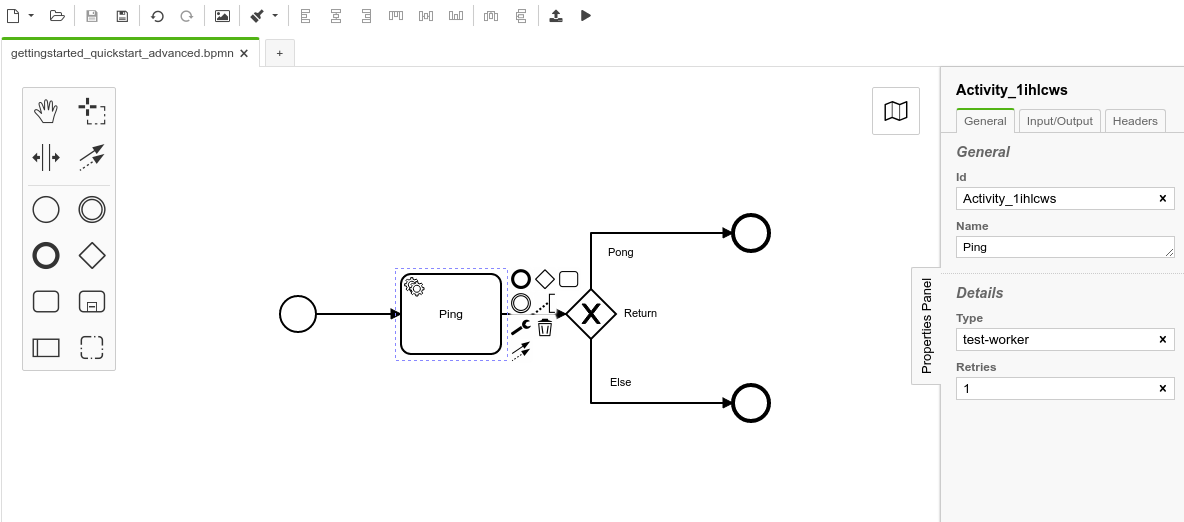
This process includes a service task and an XOR gateway. Select the service task and fill in the properties. Set the Type to test-worker.
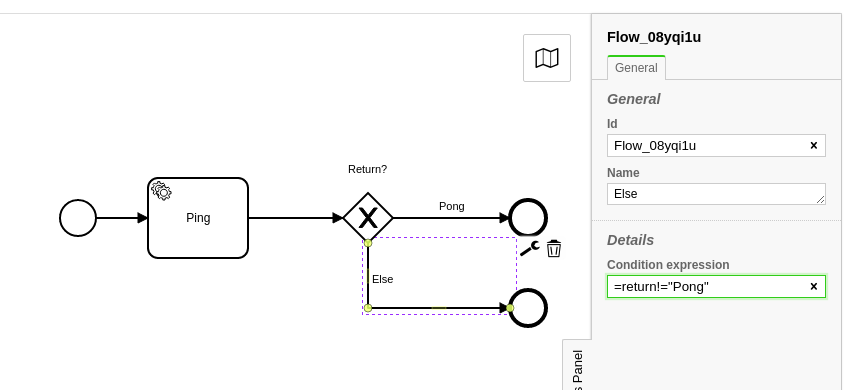
The worker will return a JSON object as a result, which is used to decide which path to take. Now, we can use the JSON object to route your process by filling in the condition expression on the two sequence flows after the XOR gateway.
Use the following conditional expression for the "Pong" sequence flow:
=return="Pong"
And for the else sequence flow:
=return!="Pong"
Deploy a Process
Now you can deploy the process. Navigate to the folder, where you saved your process.
zbctl deploy gettingstarted_quickstart_advanced.bpmn
If the deployment is successful you'll get the following output:
{
  "key": 2251799813685493,
  "processes": [
    {
      "bpmnProcessId": "camunda-cloud-quick-start-advanced",
      "version": 1,
      "processKey": 2251799813685492,
      "resourceName": "gettingstarted_quickstart_advanced.bpmn"
    }
  ]
}
Important here is the bpmnProcessId, which you'll need for creating a new instance.
Register a worker
The process uses the worker with the type test-worker. Register a new one by using the following command:
zbctl create worker test-worker --handler "echo {\"return\":\"Pong\"}"
Start a new instance
You can start a new instance with a single command:
zbctl create instance camunda-cloud-quick-start-advanced
As a result, you'll get the following output, which contains, among others, the processInstanceKey:
{
  "processKey": 2251799813685492,
  "bpmnProcessId": "camunda-cloud-quick-start-advanced",
  "version": 1,
  "processInstanceKey": 2251799813685560
}
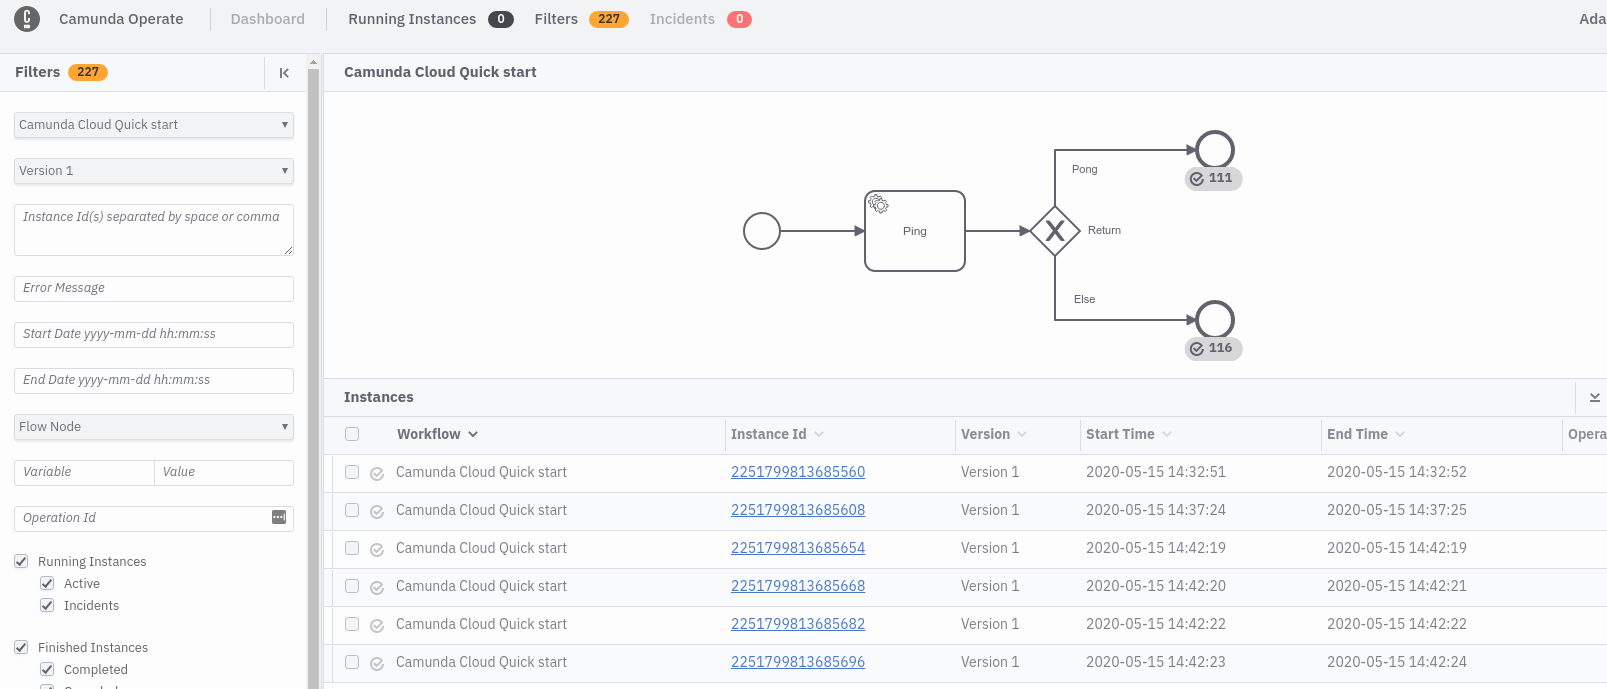
Navigate to Operate to monitor the process instance.
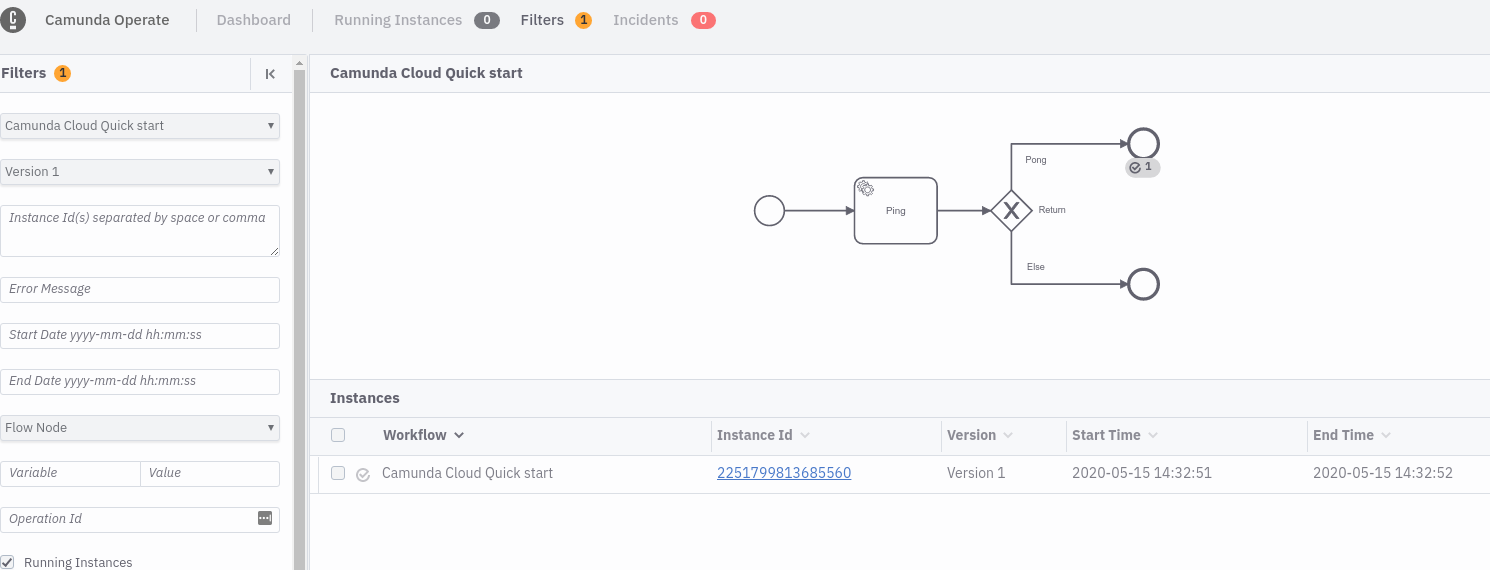
Because the worker returns
{
  "return": "Pong"
}
the process ends in the upper end event following the Ping sequence flow.
Changing the worker to
zbctl create worker test-worker --handler "echo {\"return\":\"...\"}"
and creating a new instance leads to a second instance in Operate, which you'll see ending in the second end event following the else sequence flow:
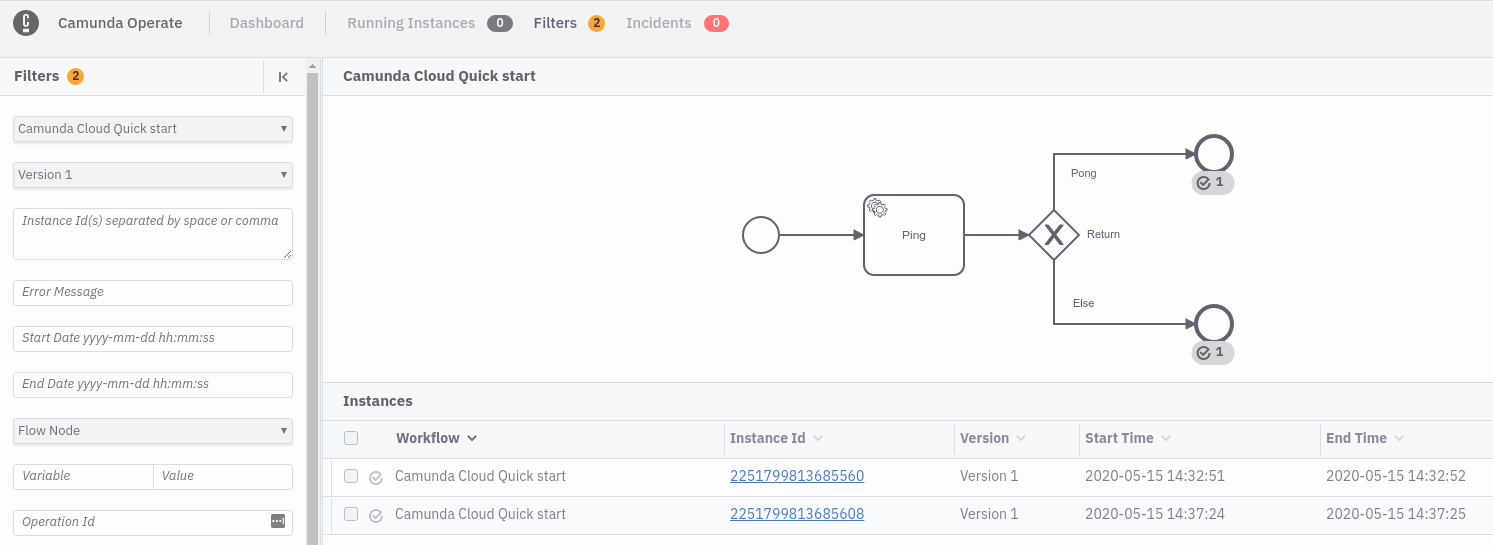
As a next step you can now connect both workers in parallel and create more process instances:
while true; do zbctl create instance camunda-cloud-quick-start-advanced; sleep 1; done
In Operate you will see instances ending in both end events depending on which worker picked up the job.
