Add and assign a role to a user
In this guide we will show you how to use Identity to create a role and assign a role to a user.
Head over to our documentation on roles to find out more.
To add and assign a role to a user, you need to have write access to Identity. Read our guide on managing user access to learn more.
Add a role
- Log in to the Identity UI and navigate to the Roles tab:

Click the Add Role button located on the top right of the table and a modal will open.
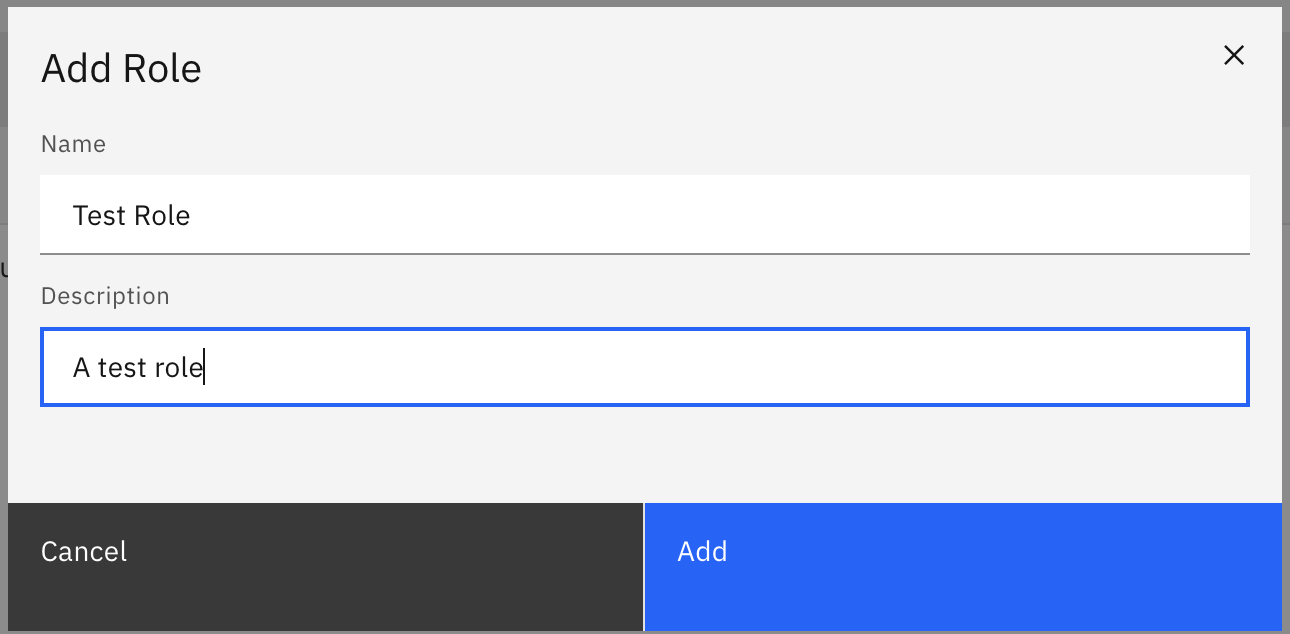
We are now able to fill out the details of the role. For this guide, we will use a set of example values. When you have inserted the details, click Add:

On confirmation, the modal will close, the table will update, and your new role will be shown. Click on your new role to view the details:

Assign a role to a user
To assign a role to a user using Identity, take the following steps:
- Log in to the Identity UI and navigate to the Users tab:

Click on the user you want to assign a role to to view their details.
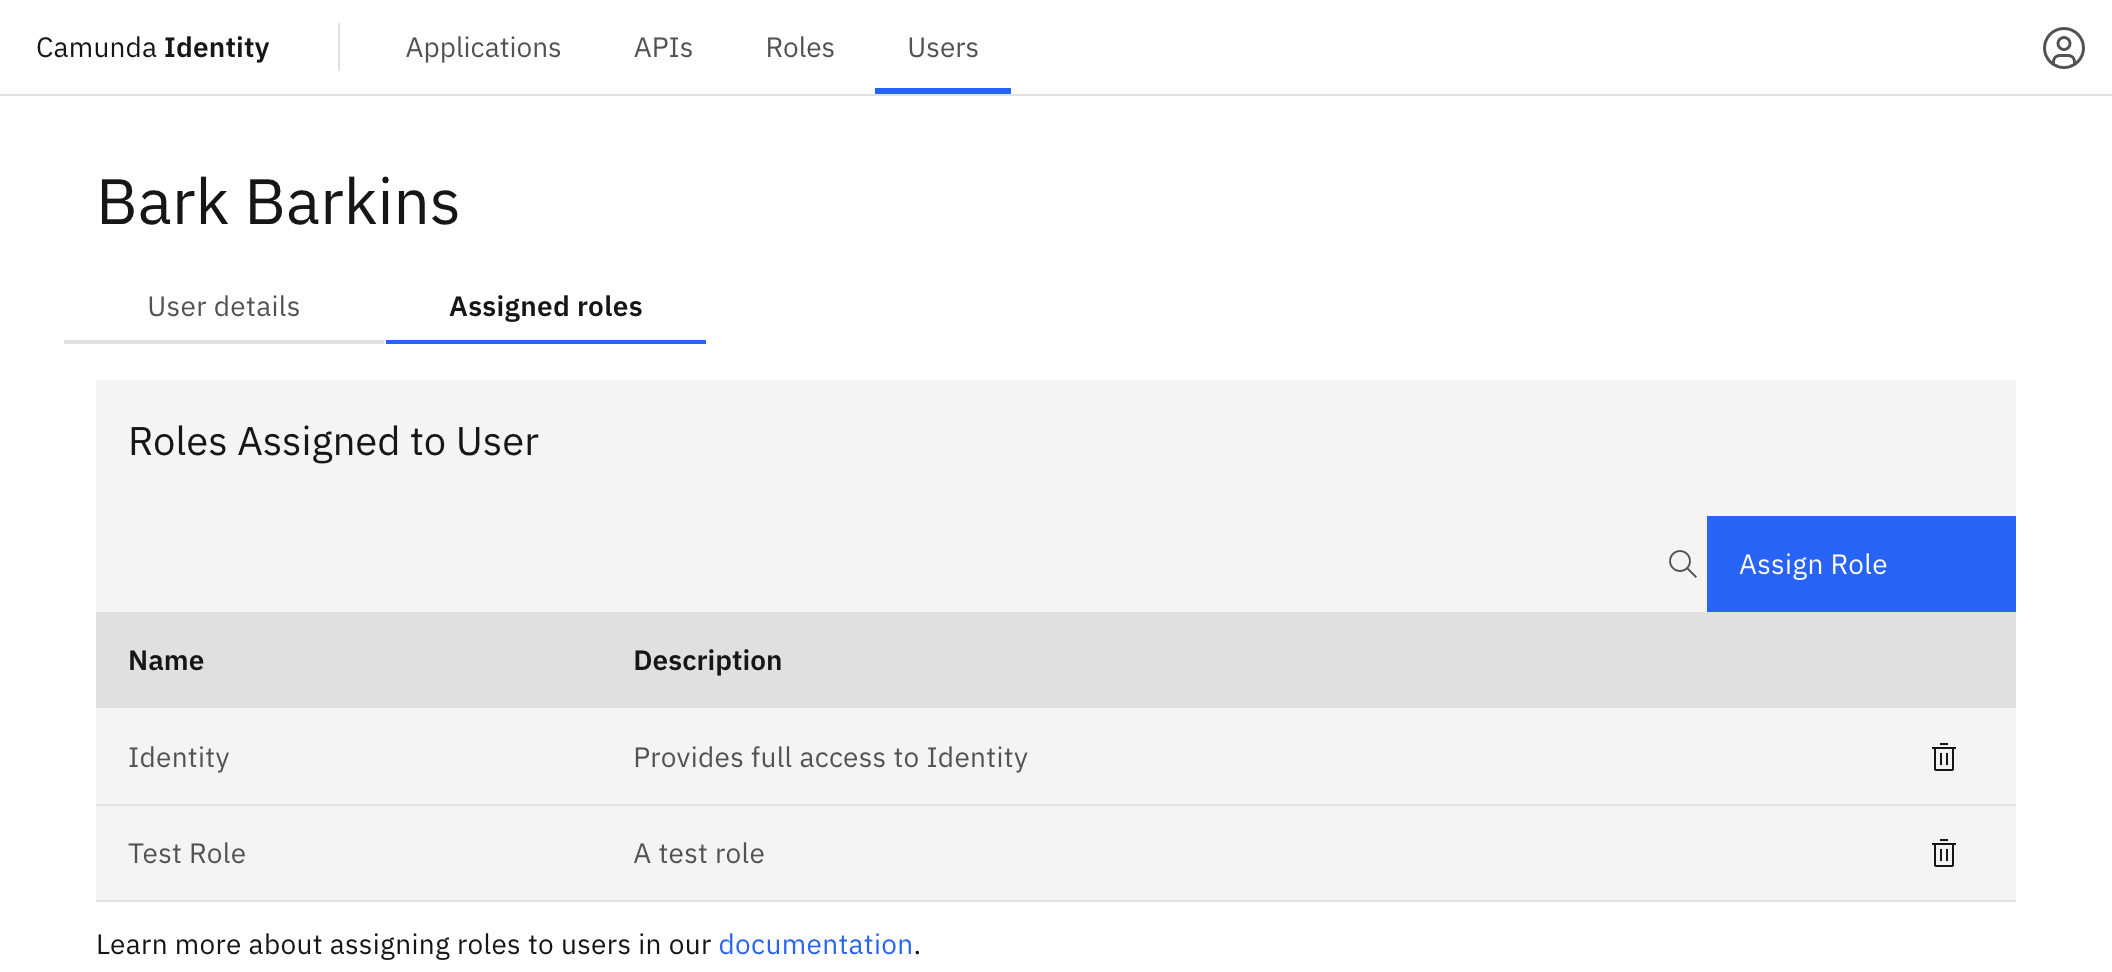
Click on Assigned Roles to view the roles currently assigned to the user.
Click the Assign Role button located on the top right of the table and a modal will open.
Select the role you want to assign to the user and click Add.
On confirmation, the modal will close, the table will update, and the newly assigned role will be shown:
