Managing resource authorizations
In this guide you will learn about the methods to control resource access within the Identity application.
Creating resource authorizations
Resource authorizations can be configured for an individual user or a group. Below we show you how to create authorizations for both:
- Groups
- Users
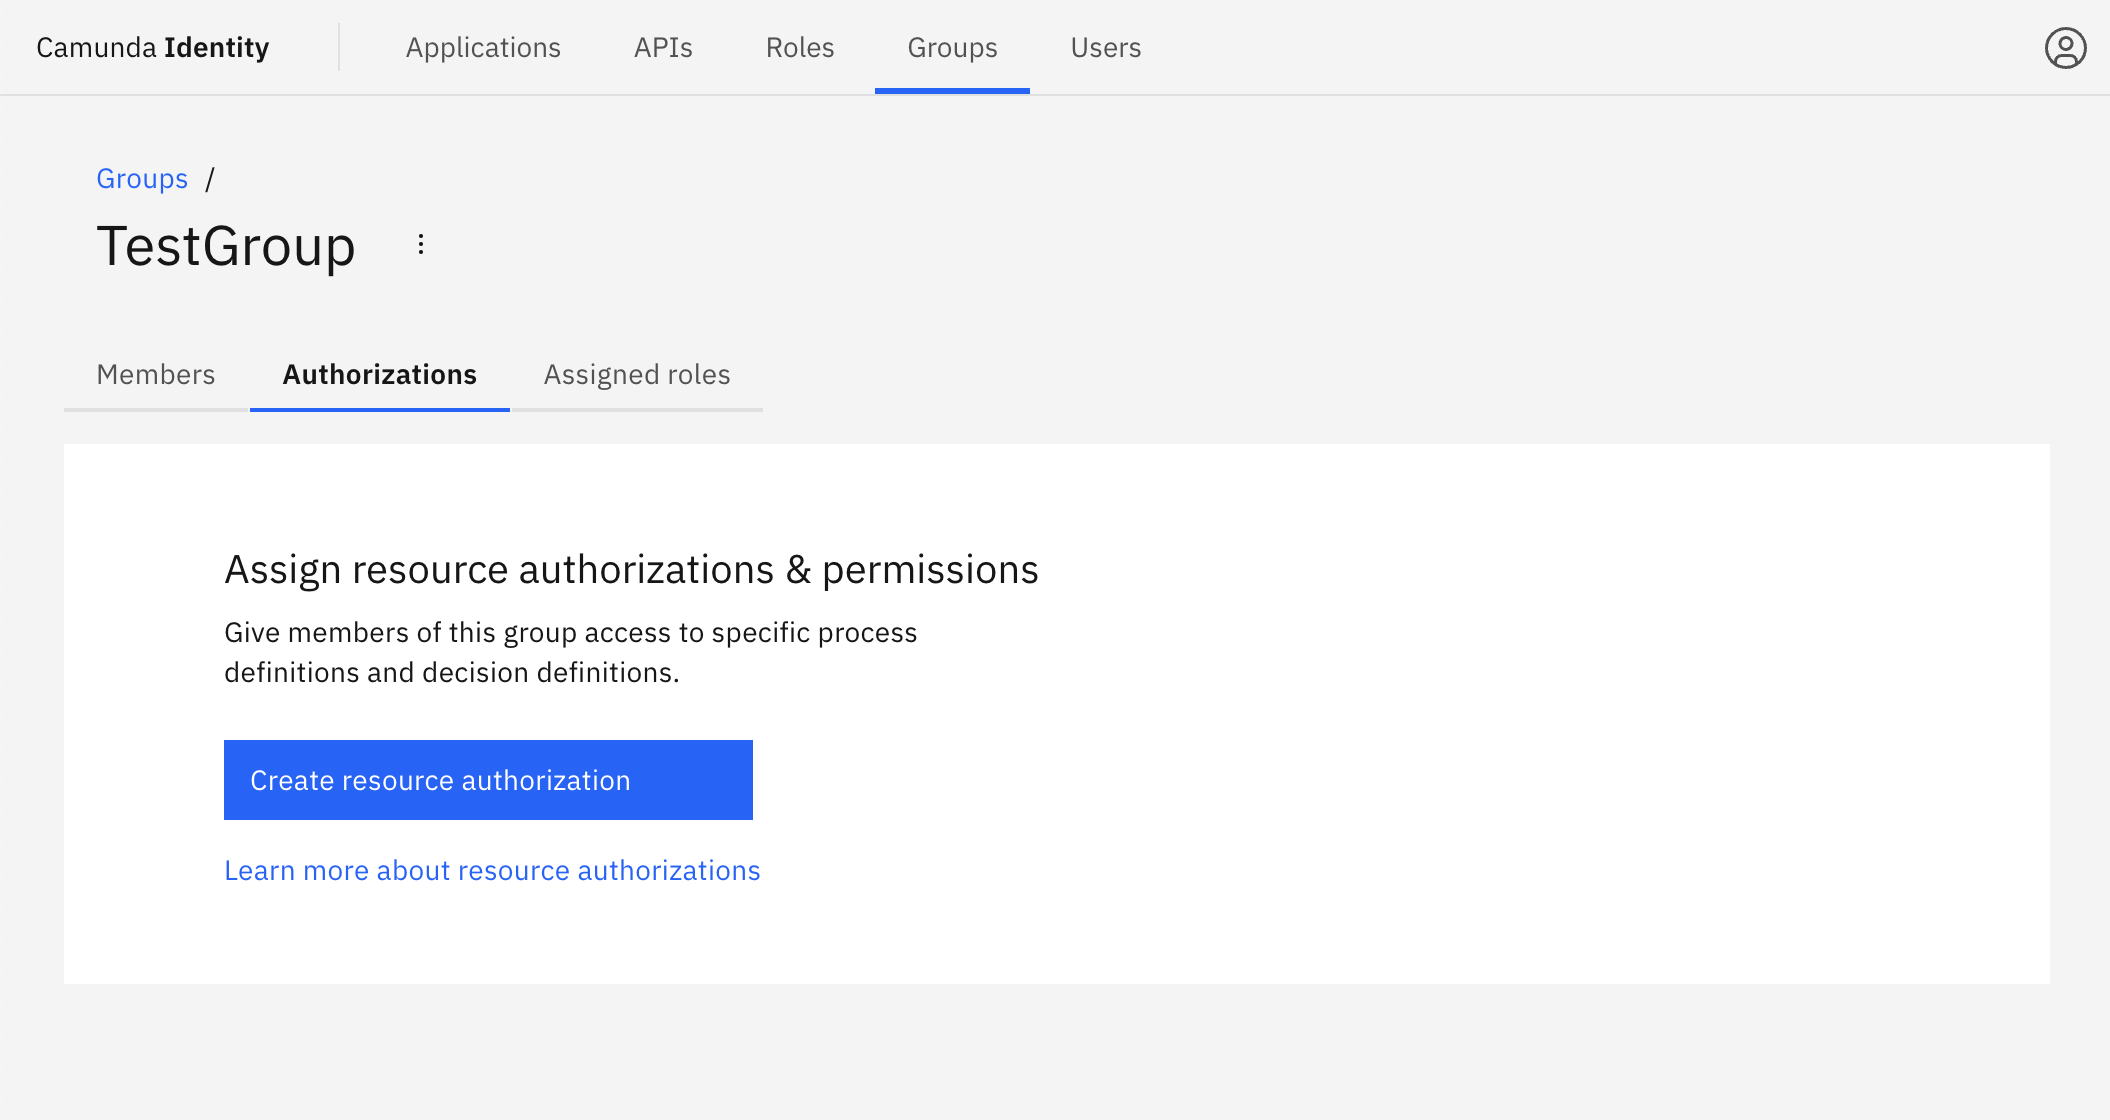
- Log in to the Identity UI and navigate to the Groups tab. Select the group you would like to create an authorization for from the table, and click on the Authorizations tab:
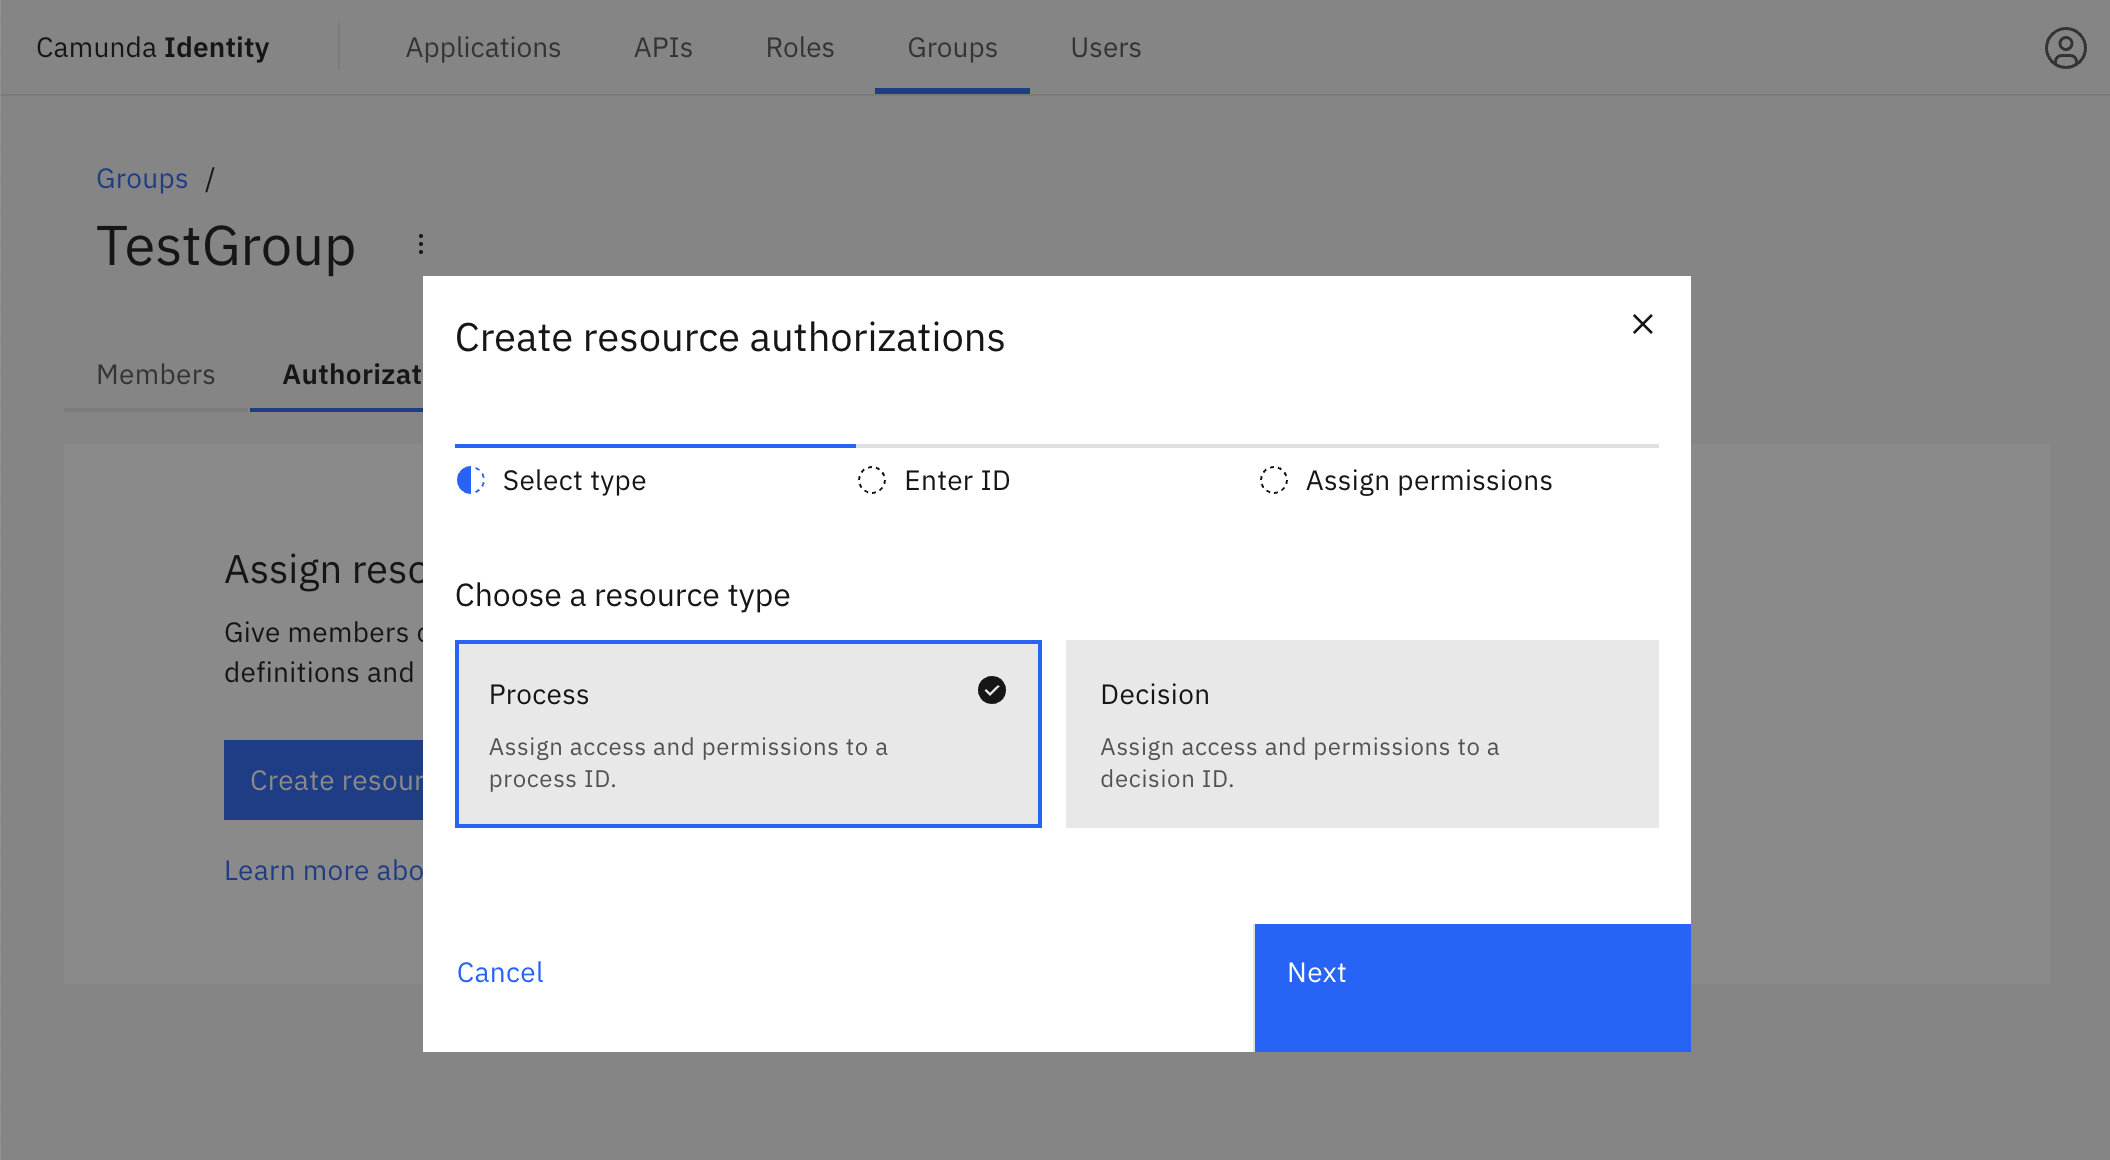
- Click Create resource authorization and a modal will open. Select the type of resource you are creating an authorization for, and click Next:
- Input the ID of the resource you would like to create an authorization for, select the resource from the list, and click Next:
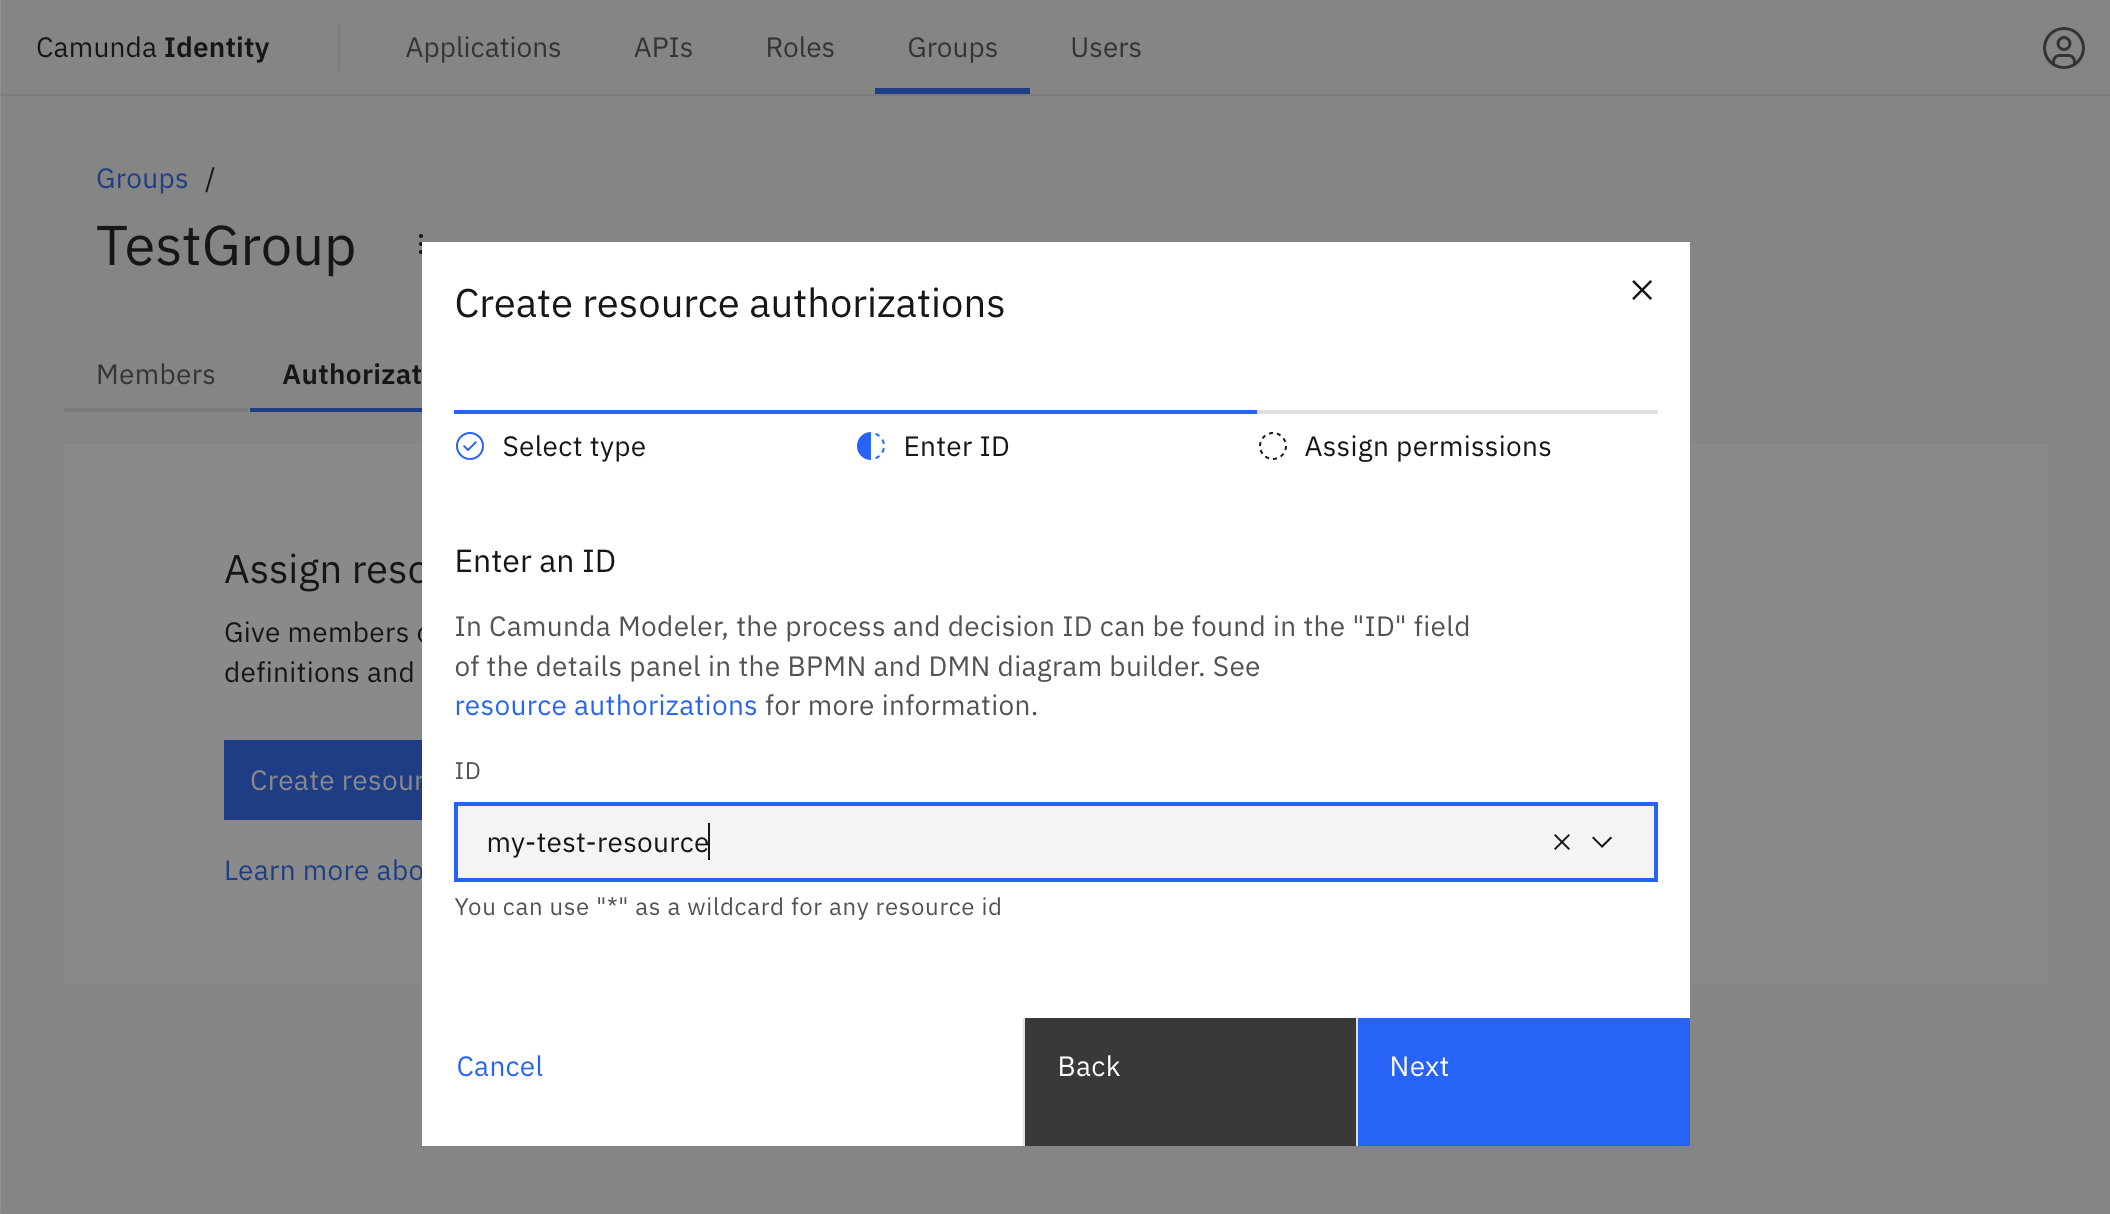
Want to apply an authorization to a wide range of resources? We support a wildcard character * to match any resource.
Partial matching, for example my-resource*, is not supported.
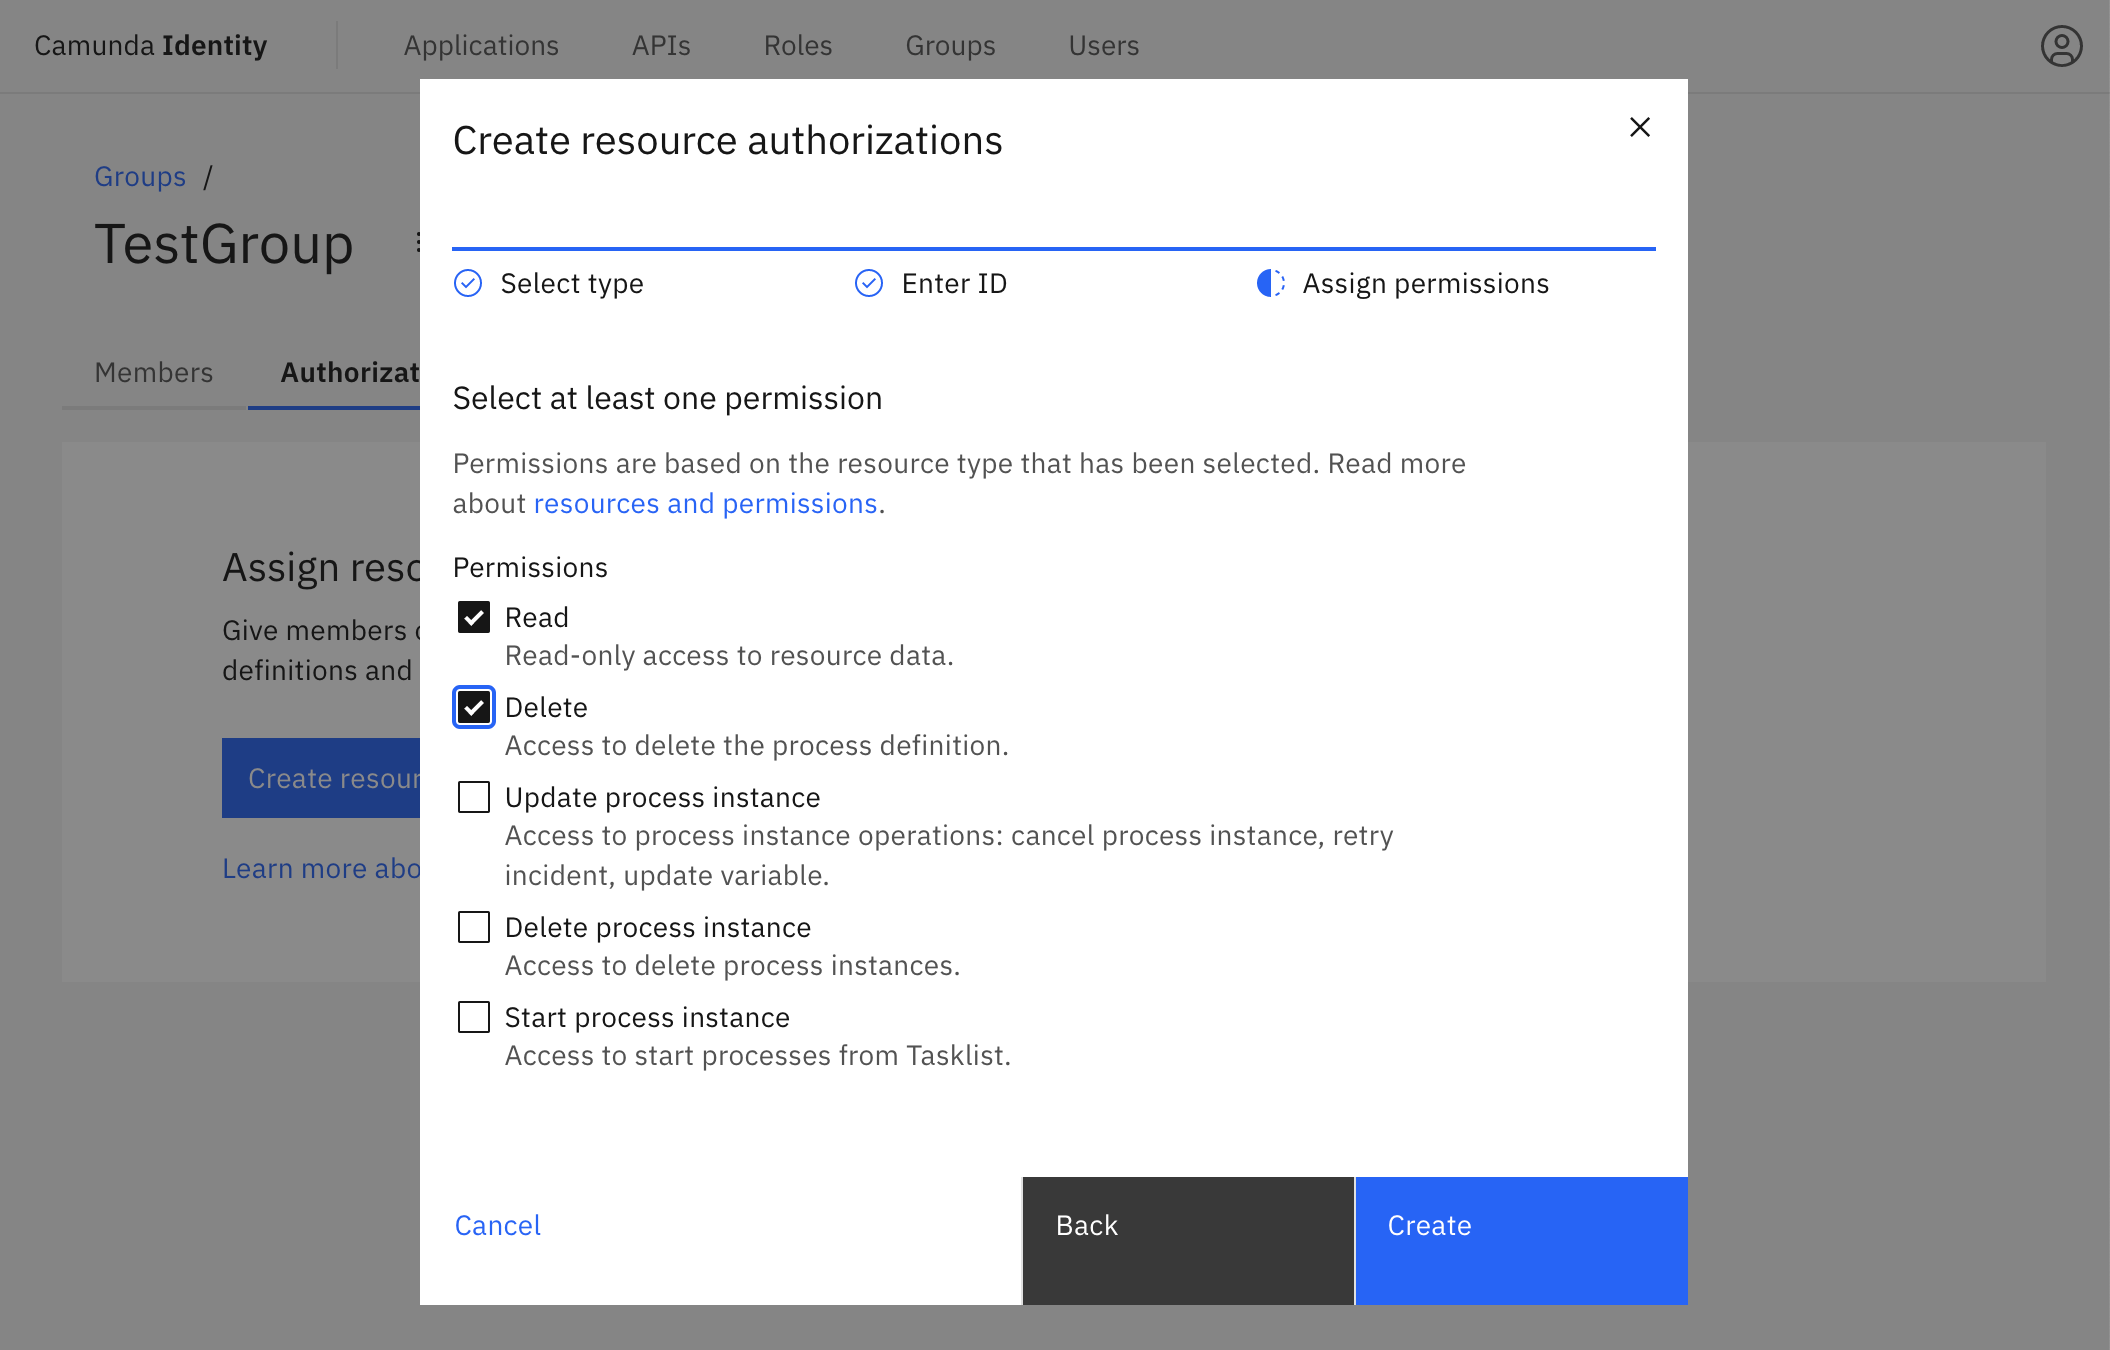
- Select the permissions you would like to assign, and click Create:
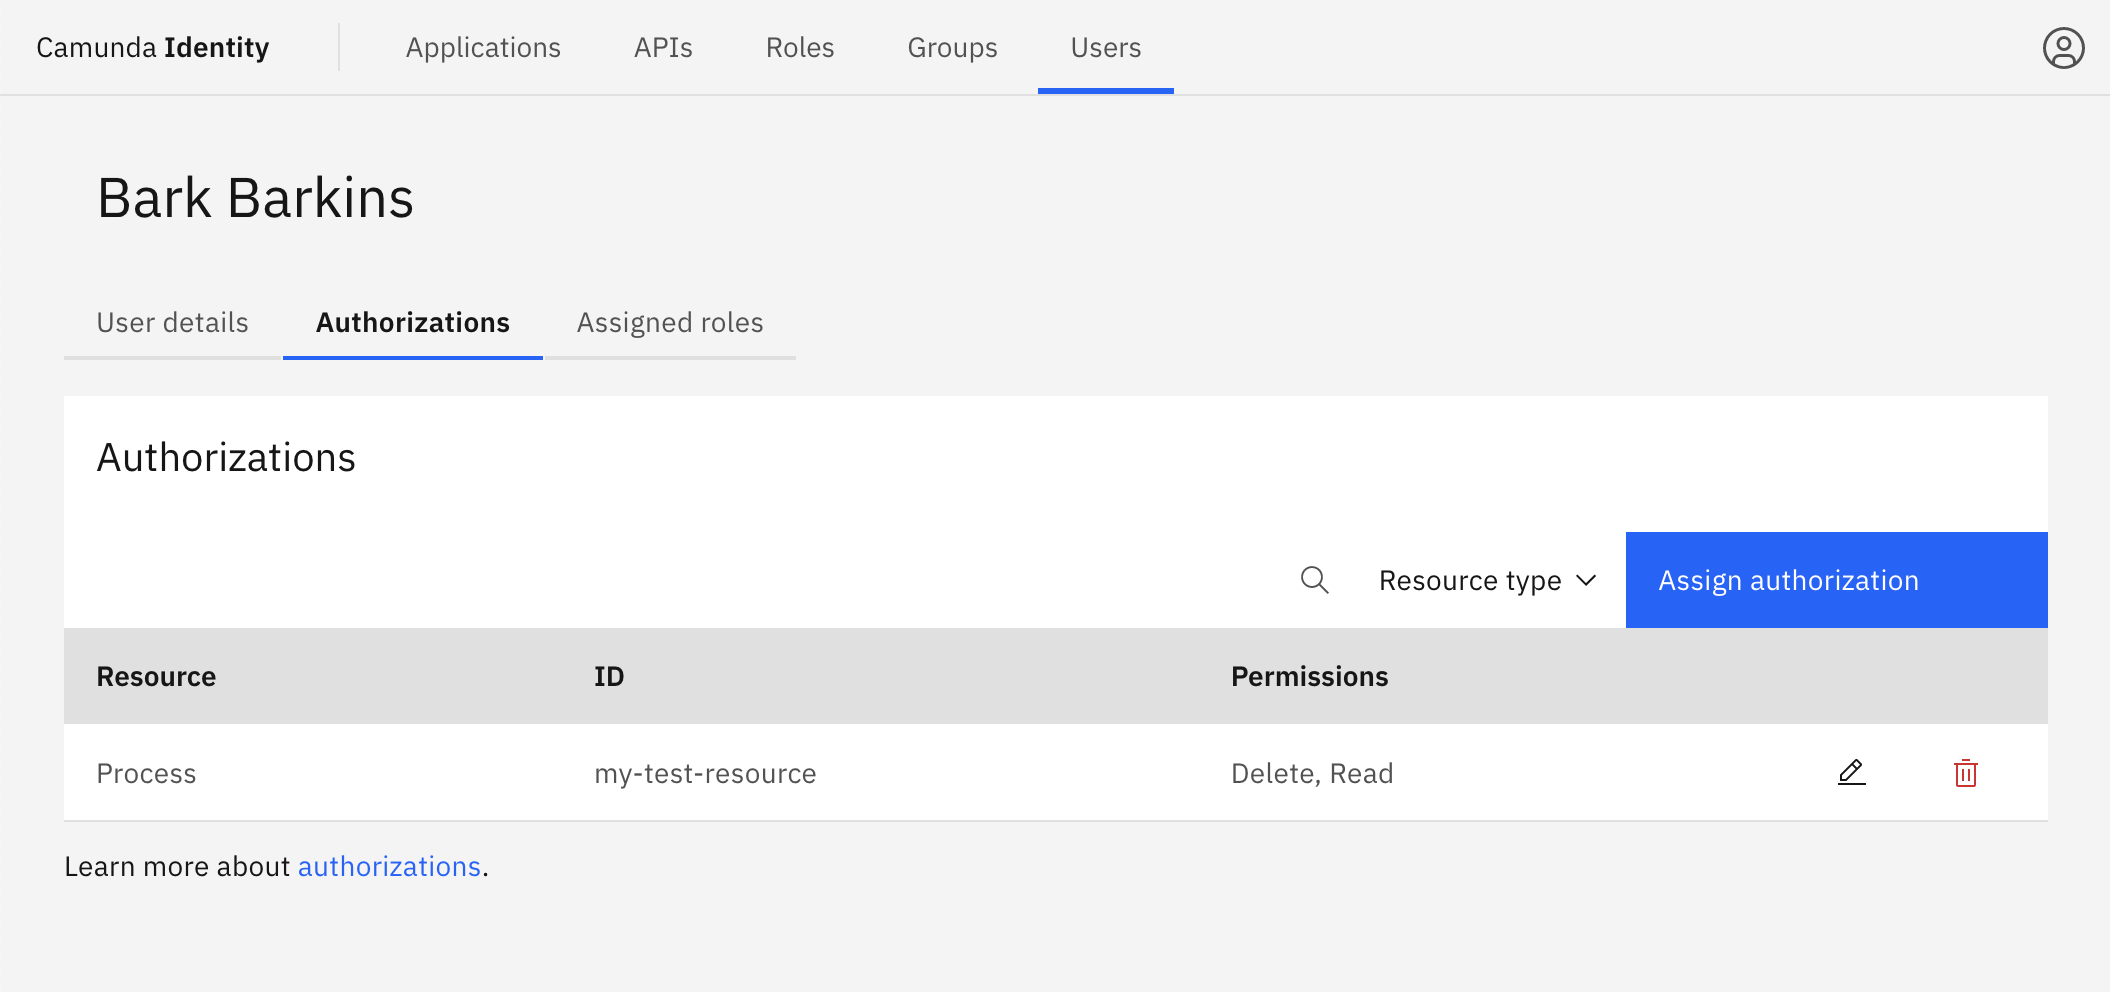
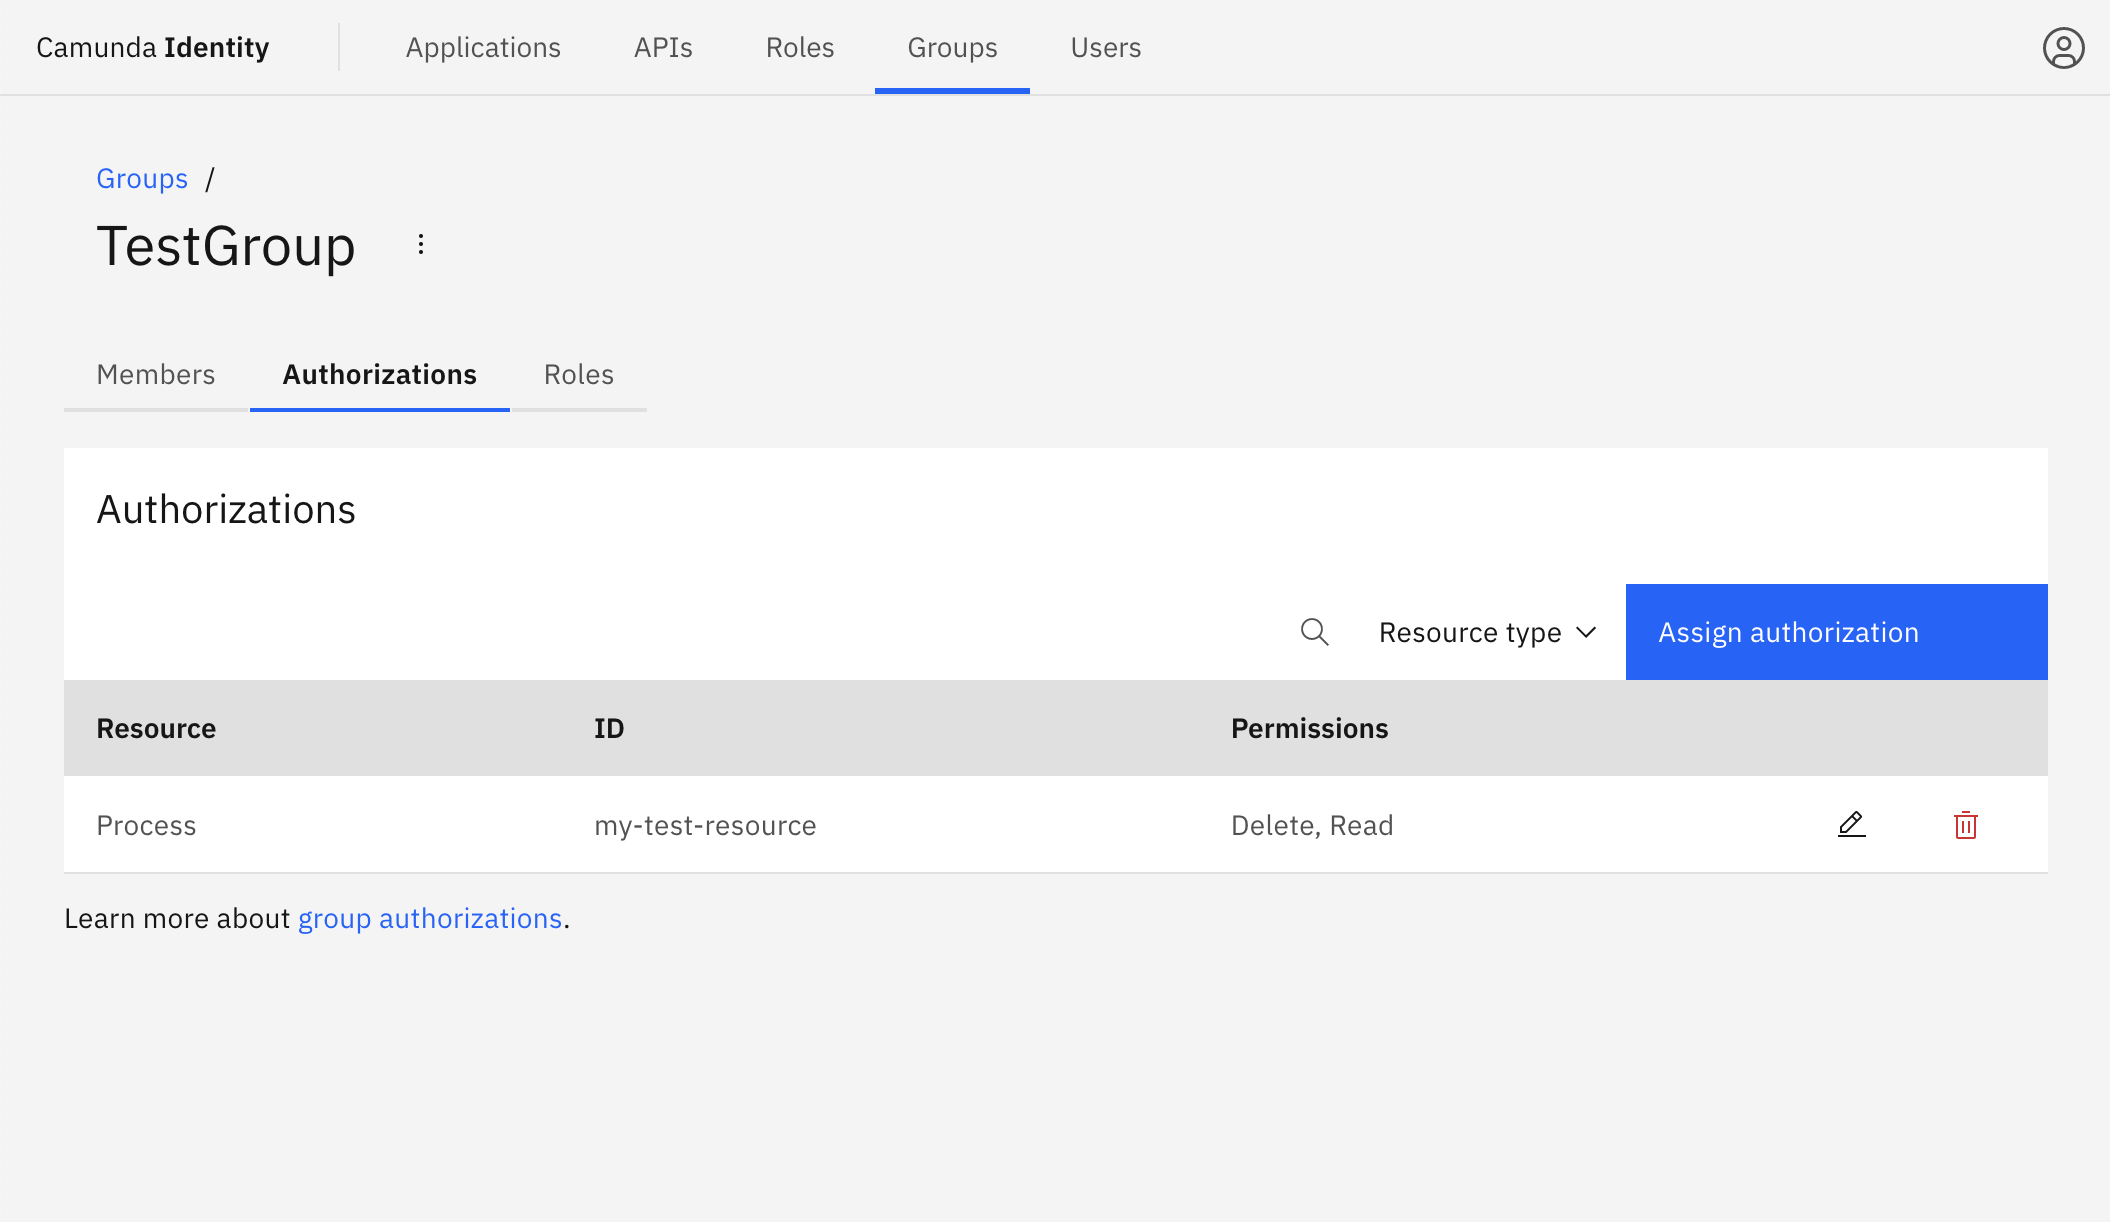
On confirmation, the modal closes, the table updates, and your authorization is shown:
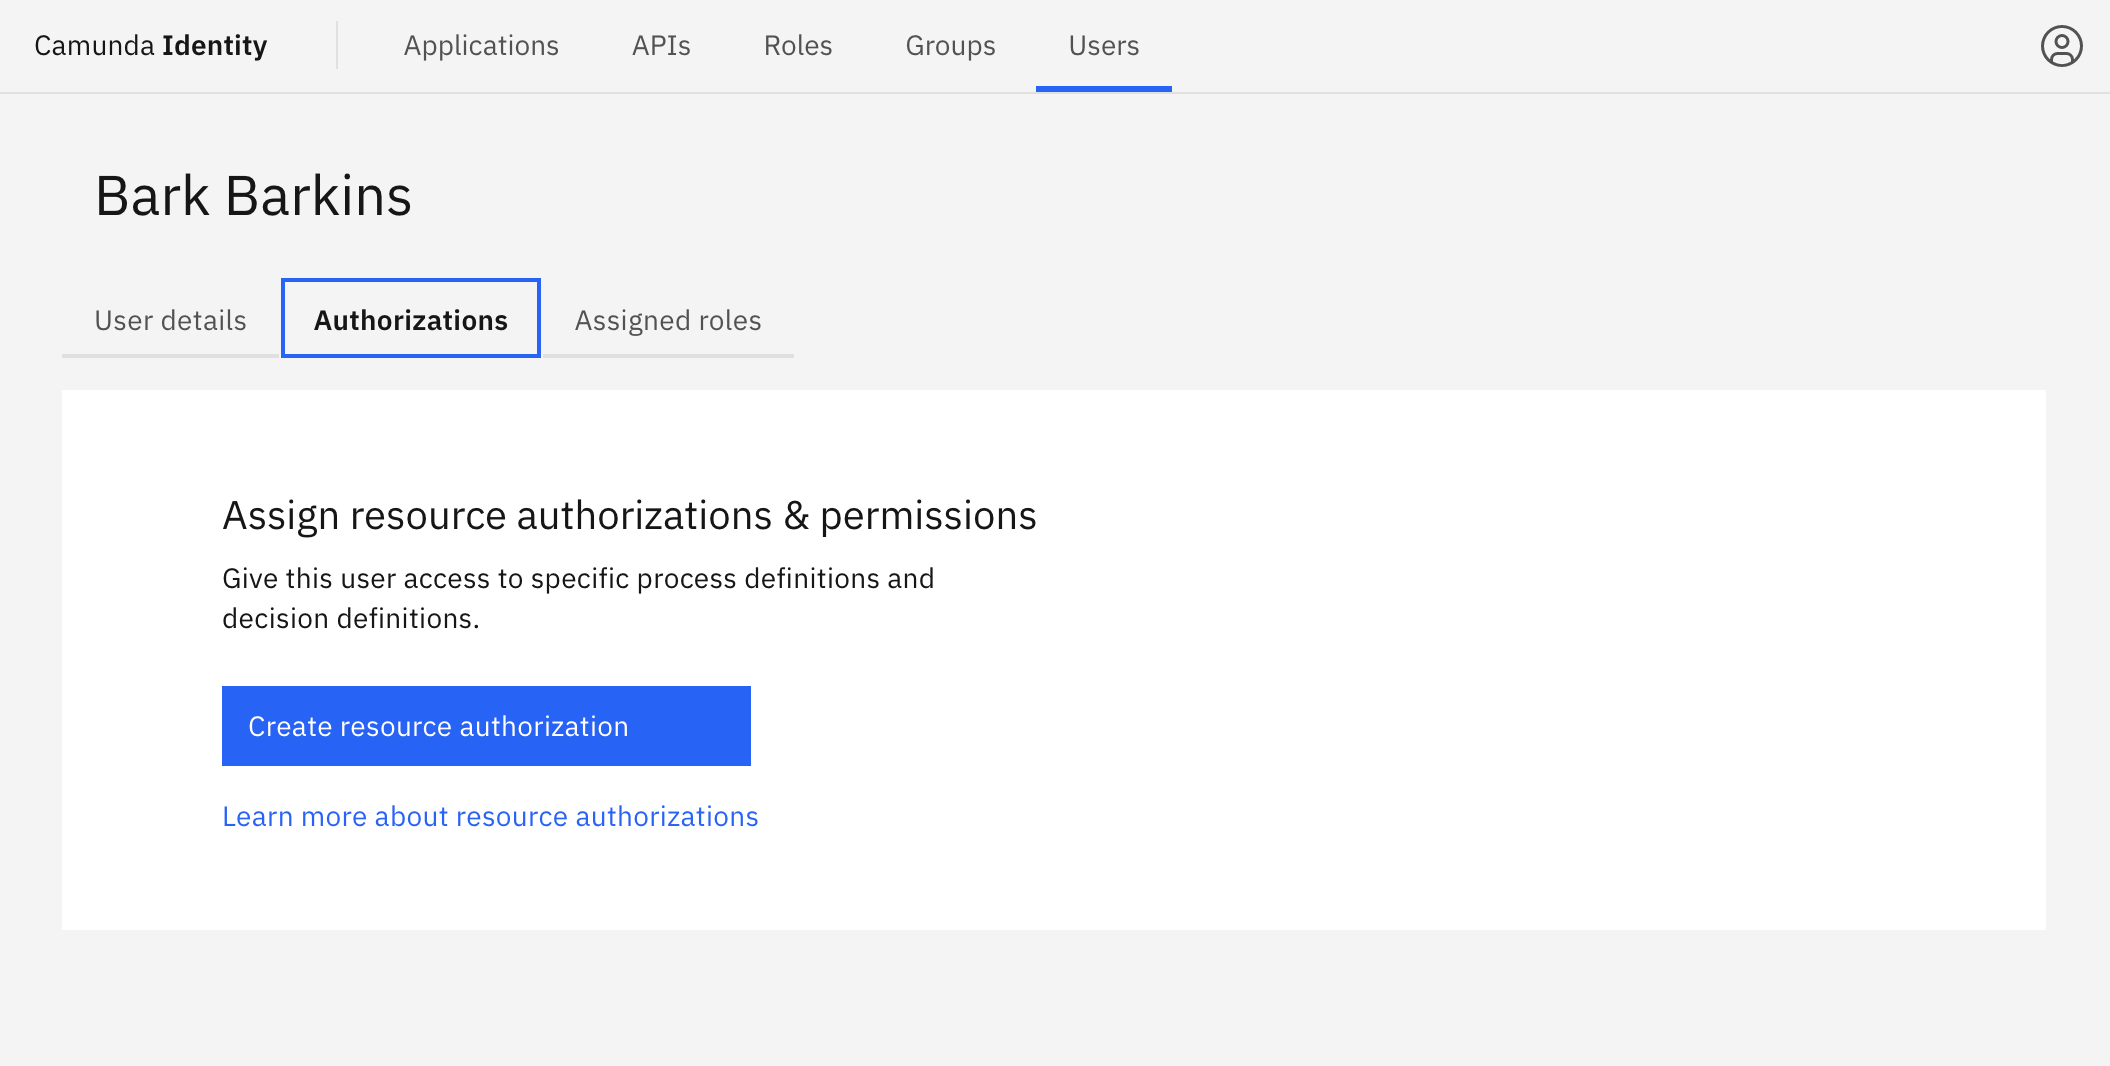
- Log in to the Identity UI and navigate to the Users tab. Select the user you would like to create an authorization for from the table, and click on the Authorizations tab:
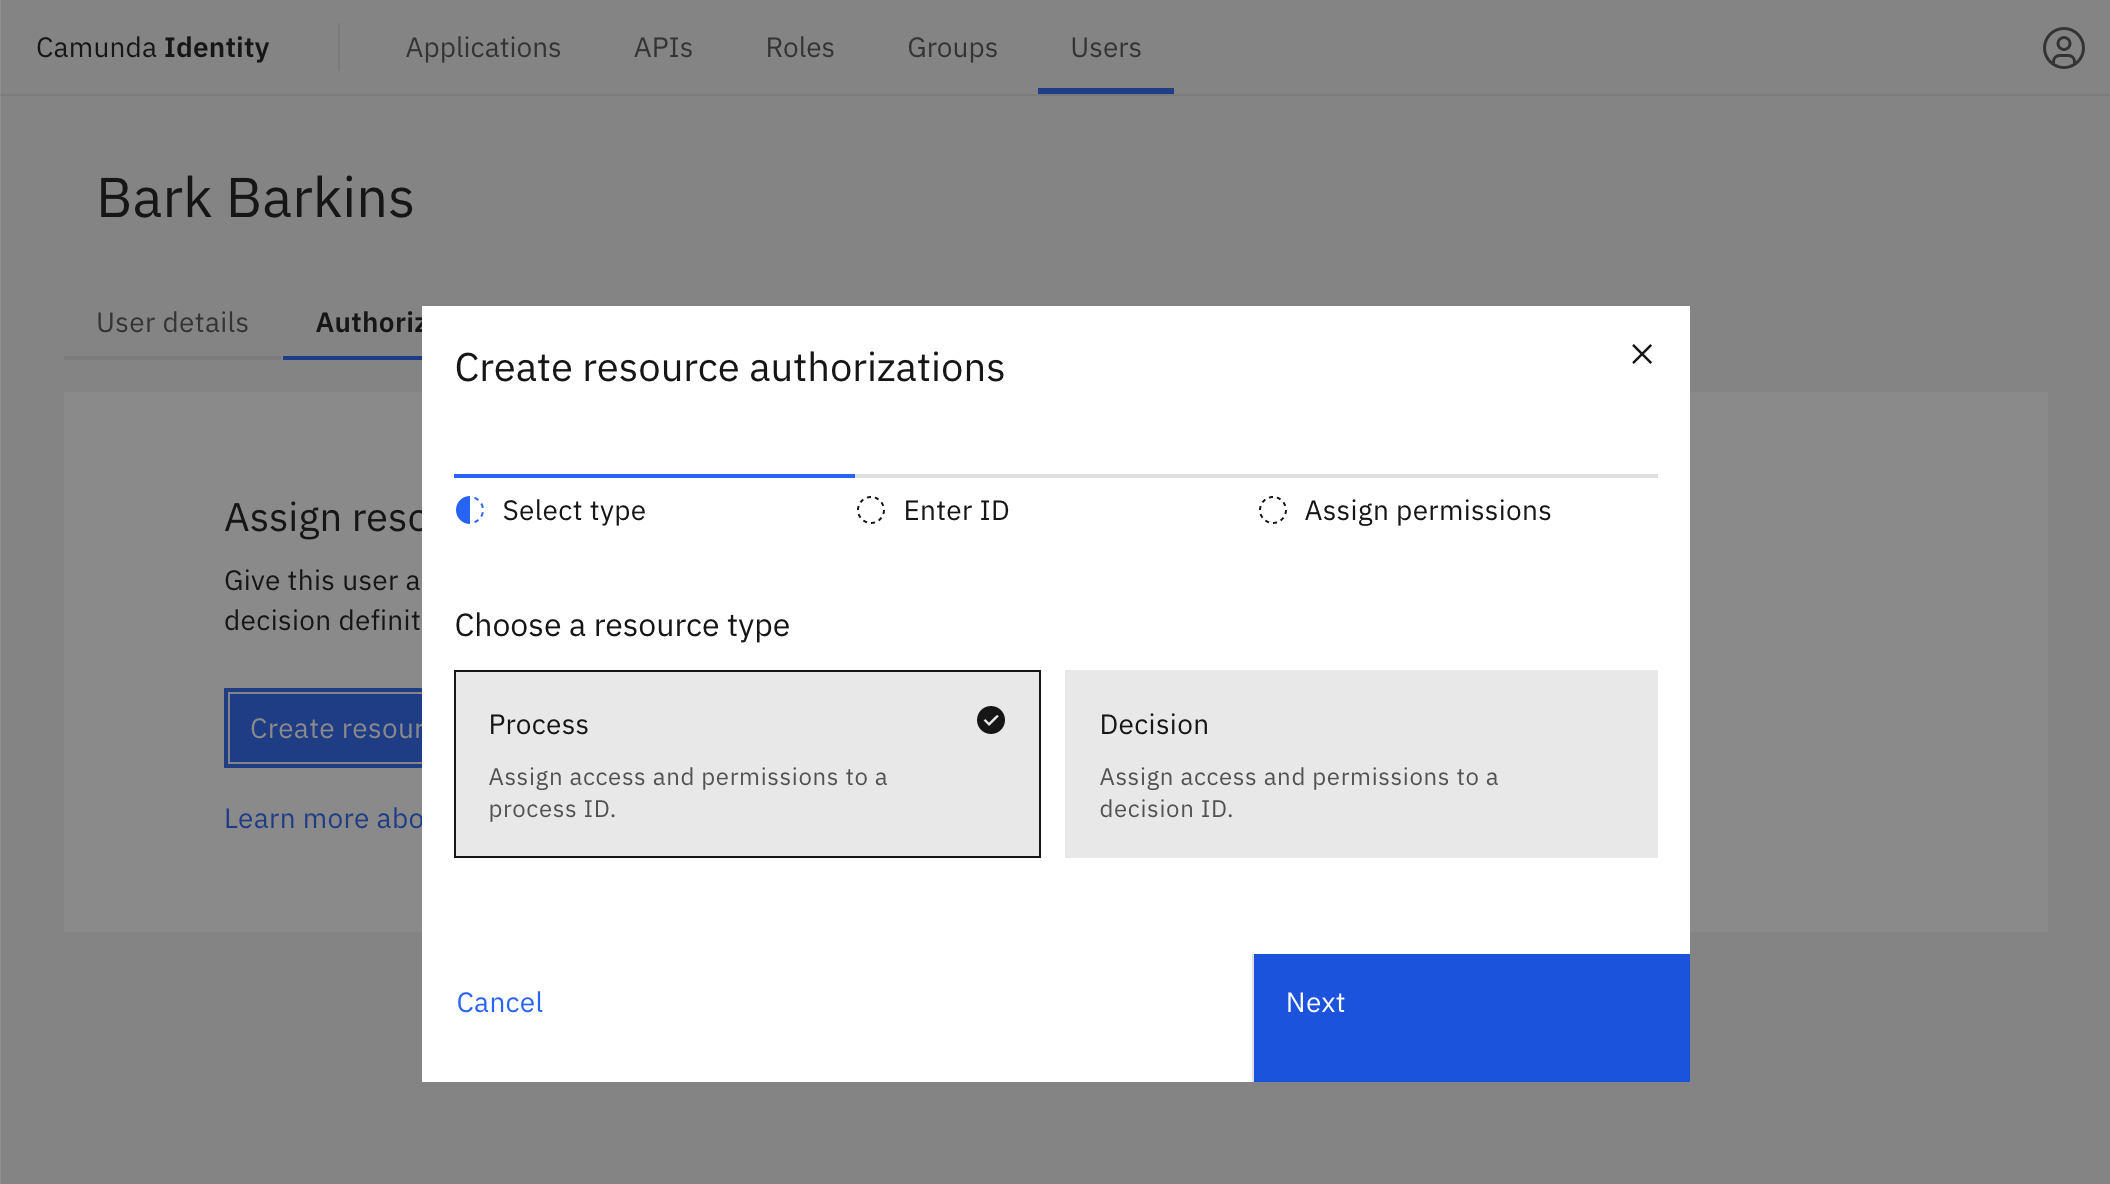
- Click Create resource authorization and a modal will open. Select the type of resource you are creating an authorization for, and click Next:
- Input the ID of the resource you would like to create an authorization for, select the resource from the list, and click Next:
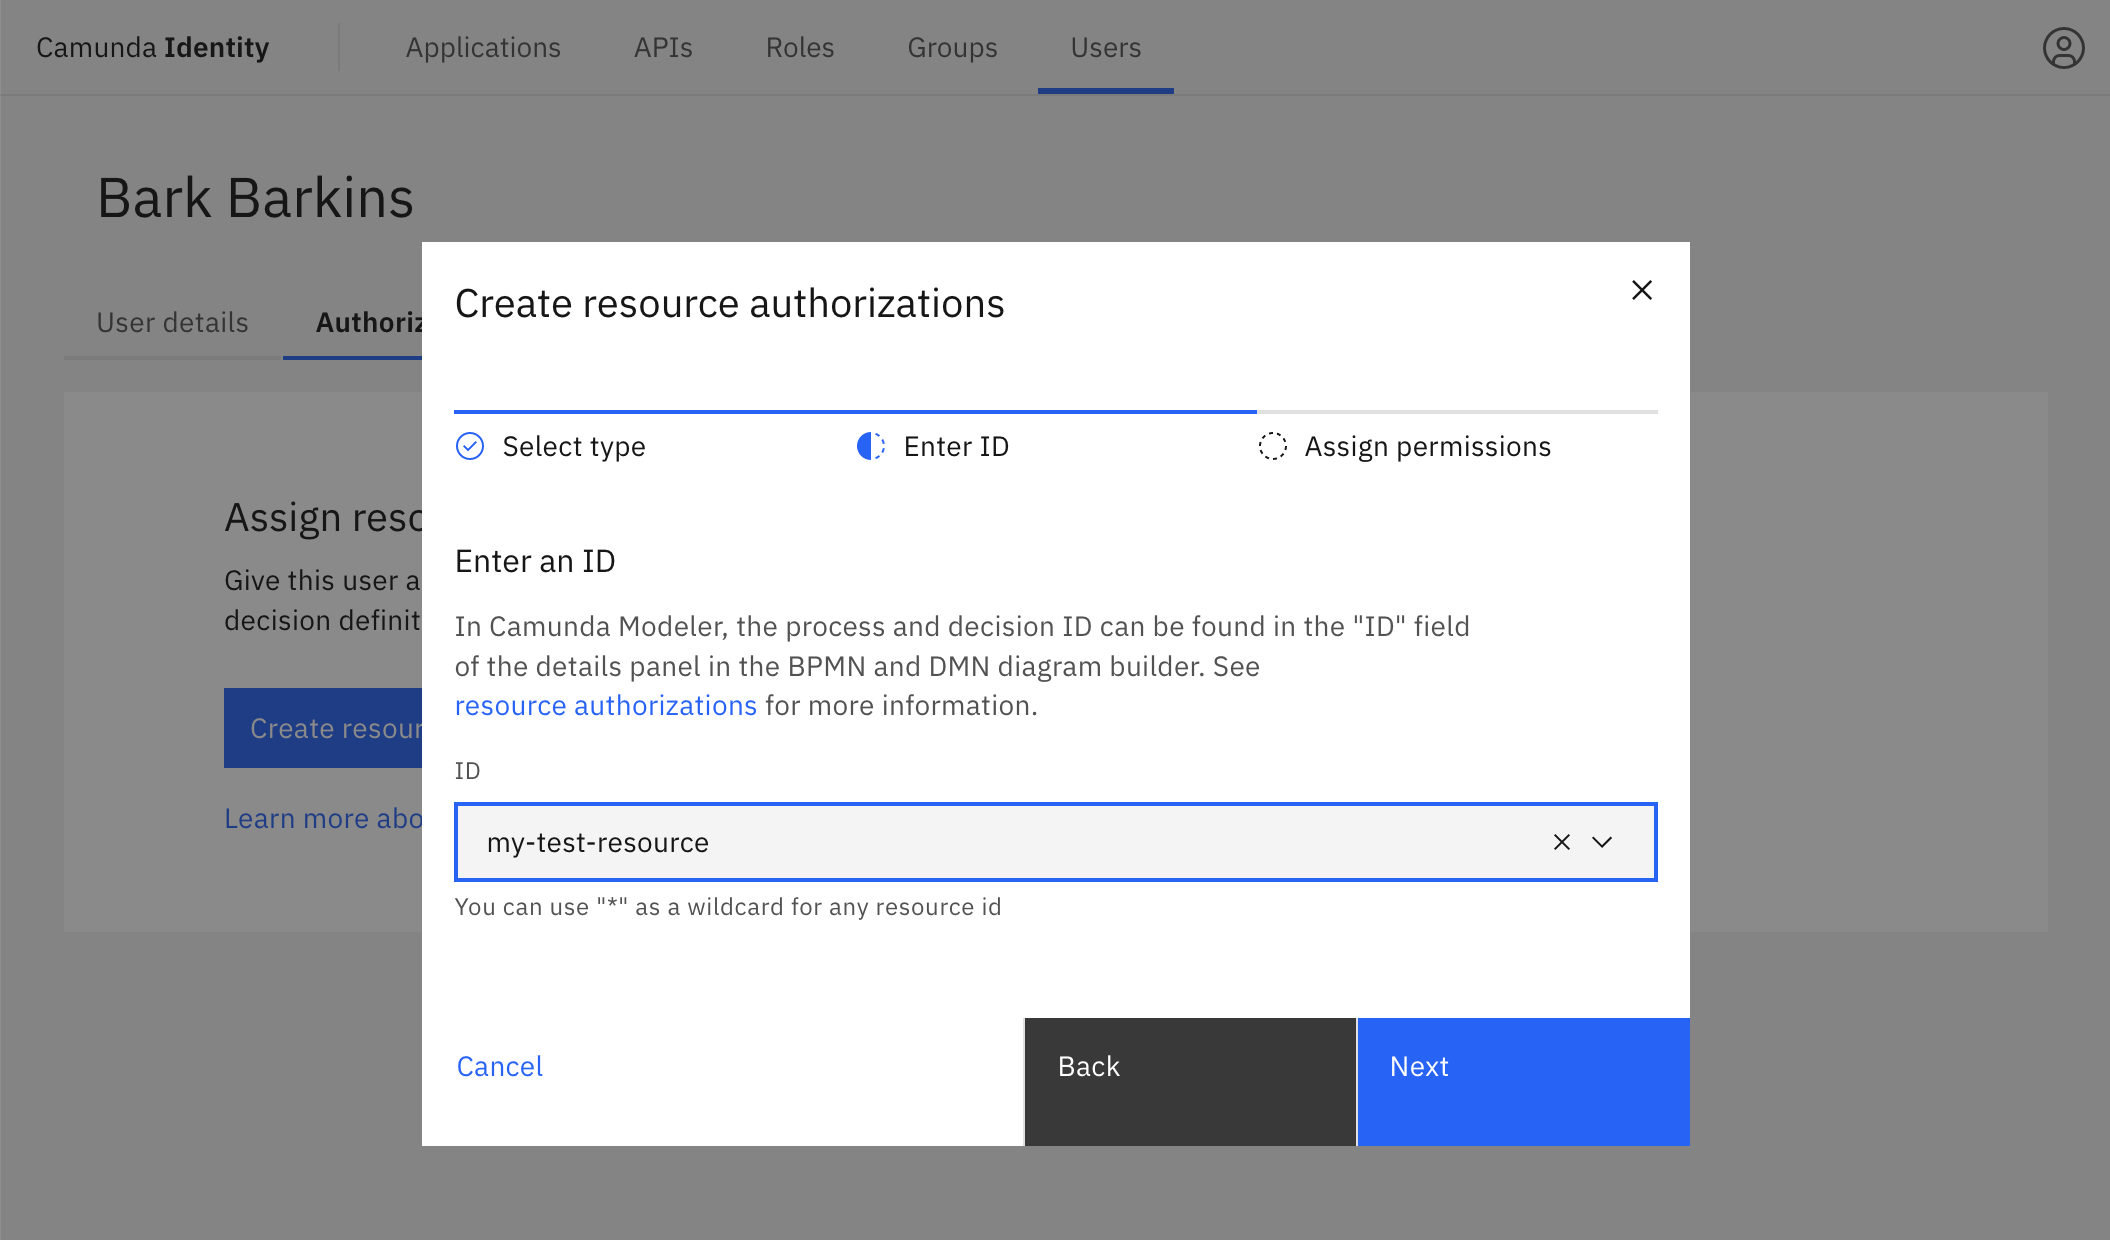
Want to apply an authorization to a wide range of resources? We support a wildcard character * to match any resource.
Partial matching, for example my-resource*, is not supported.
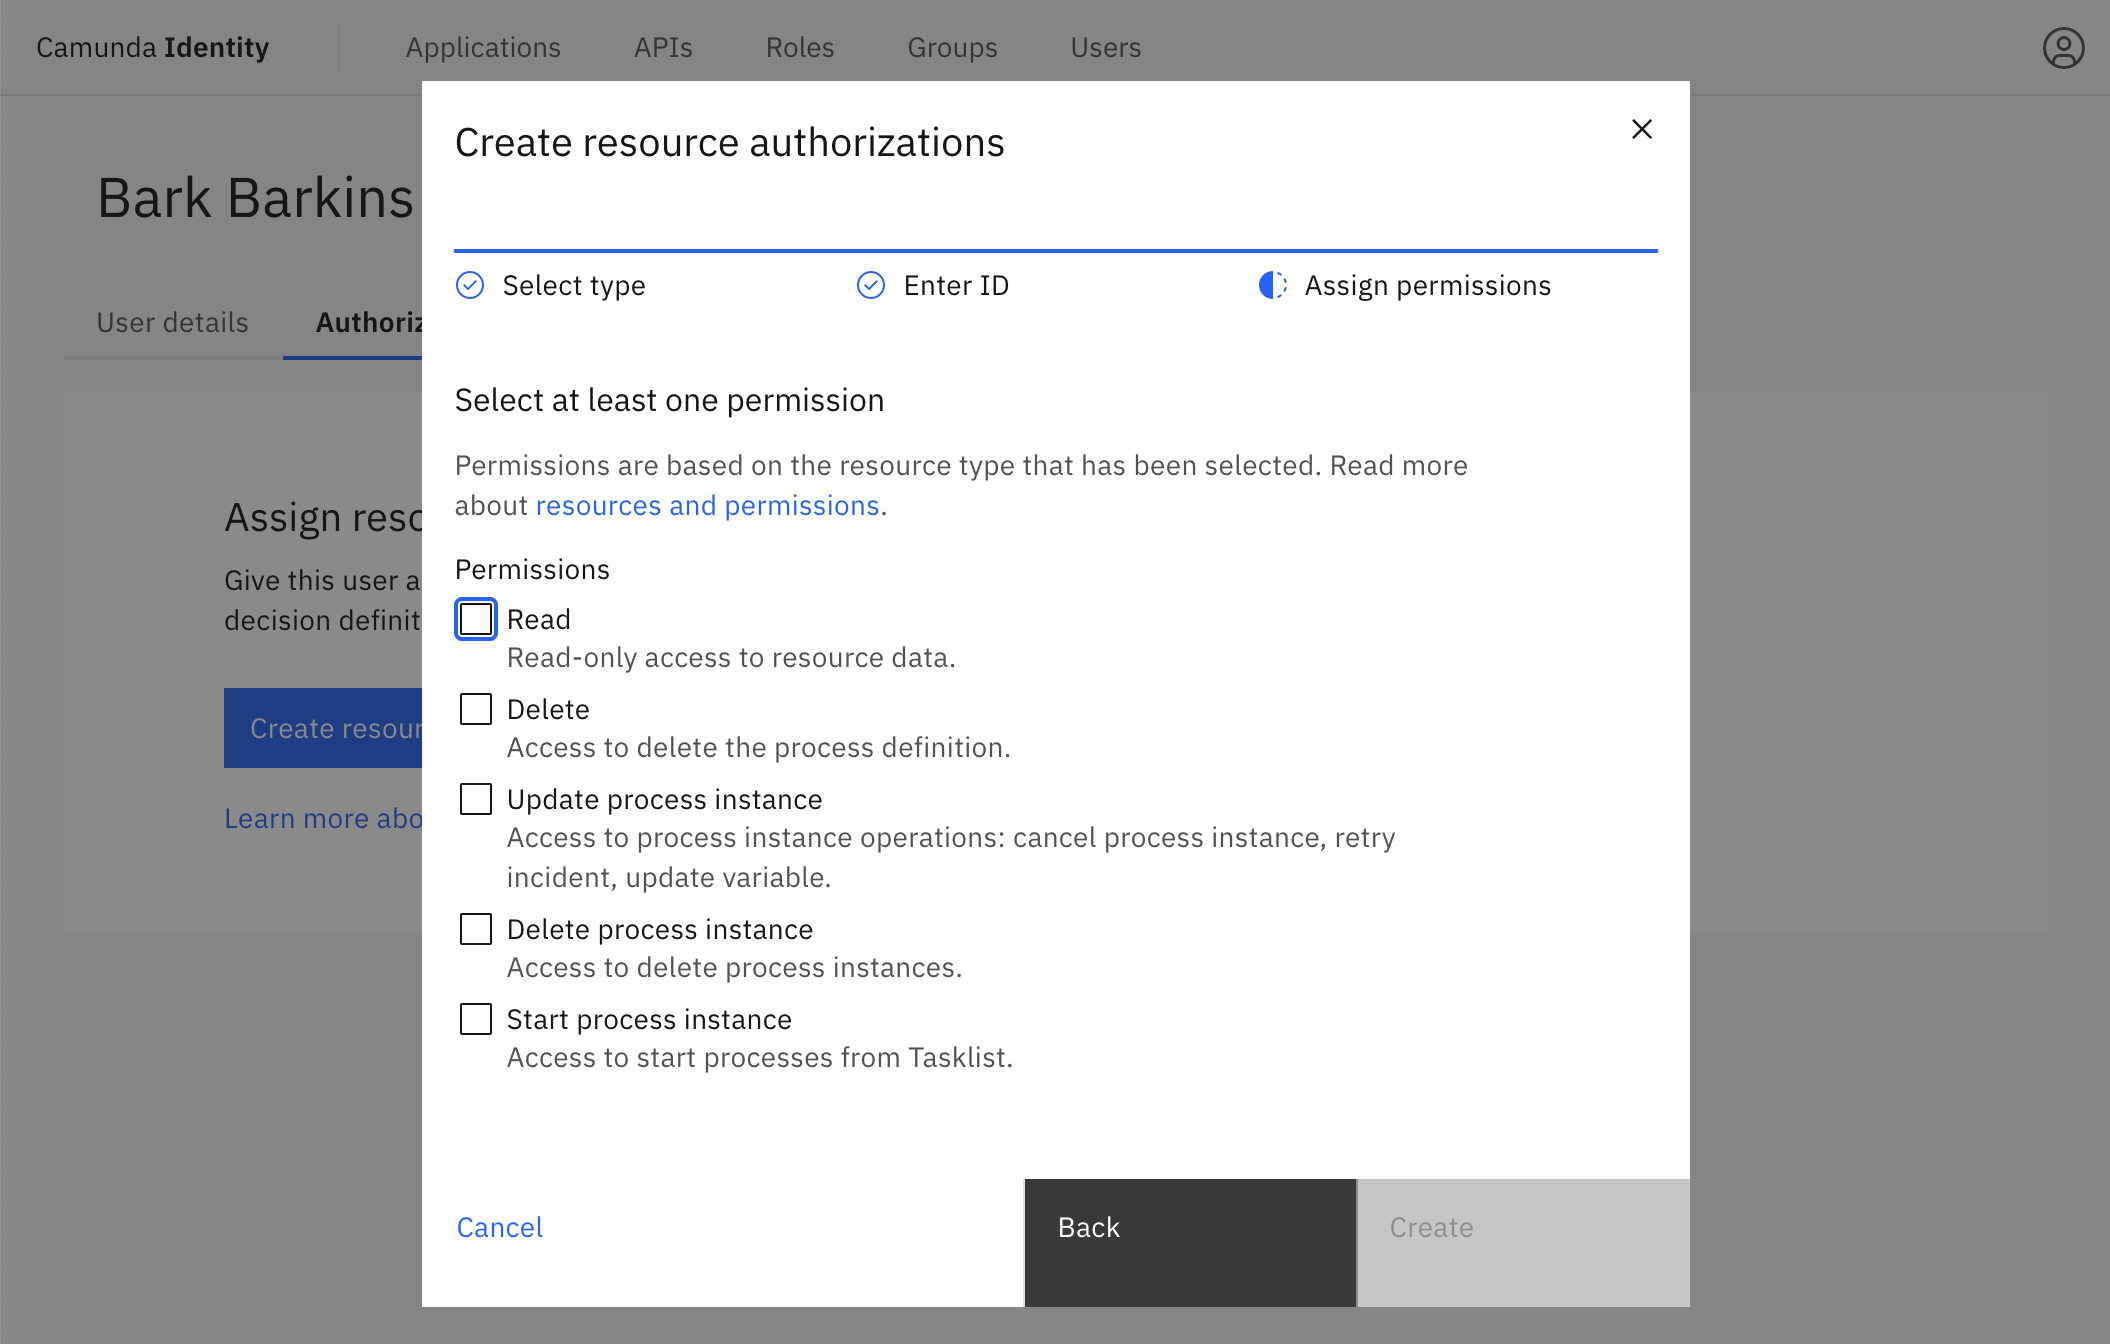
4):. Select the permissions you would like to assign, and click Create:
On confirmation, the modal closes, the table updates, and your authorization is shown:
